The Rib-O-Lator is simple, goofy fun and works on 22 inch Weber kettles and all standard size gas grills. The Rib-O-Lator consists of four stainless steel trays that attach to your existing rotisserie; it does not come with a spit or motor.

The box is pretty fun….Advanced BBQ Technology….how can you argue with that?

Benefits of the Ribolater and Why You Need One
Capacity: The four rotating trays increase the amount of meat that you can grill. I can easily fit seven extra large whole chicken wings on a tray. Using all four trays gives me the ability to grill 28 jumbo wings at a time. You simply can’t fit that many wings onto a standard 22.5 inch kettle and be able to grill them without burning.
Versatility: The slotted trays make it easy to grill foods that are a pain in the butt on a standard grill grate. Think of all of those thin foods that will slip through a regular grate: asparagus, shrimp, sliced peppers and onions. With the Ribolator you just toss them onto a tray and let them spin!
Crispy Chicken Wings: I love grilled wings but the one thing that was always lacking was a crispy skin. If I used indirect heat the skin would never crisp up. If I used direct heat then I was standing over a hot grill and constantly moving the wings so they wouldn’t burn. It just wasn’t working for me. With the Ribolator I was able to use direct high heat for crispy skin and since the wings are always moving they don’t get burnt.
Entertainment: You can’t discount the value of having fun. If you don’t grin at the thought of a meat filled Merry Go Round inside your grill then there is something wrong with you.
 Ribs: The true beauty of the Rib-O-Lator shines through when it is time to grill up some ribs! If you have a Weber kettle or Genesis then you do not need a Rib-O-Lator to cook one or two slabs of ribs. But what happens when you have a crowd to feed and two slabs are not enough?
Use a rib rack? Roll your ribs? Use stacking hover trays? I have tried all of the tricks and personally I think they stink. With the Rib-O-Lator it is EASY to cook four slabs of St Louis spares or baby back ribs at once. Here is a great video showing the Rib-O-Lator in action with four slabs of ribs on a kettle.
How to Assemble the Ribolator
Putting the Rib-O-Lator together is pretty easy. Take the forks off the spit and add the two spokes with the pins facing inward.
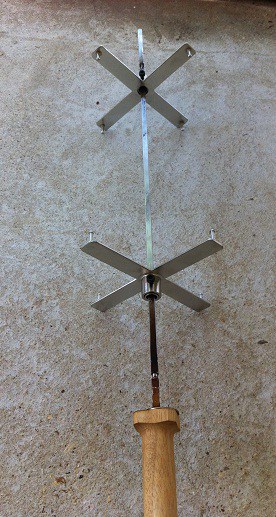 Attach the trays to the pins.
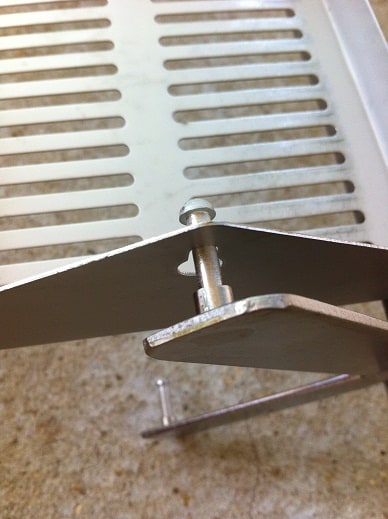 Add one tray, then another, then another….

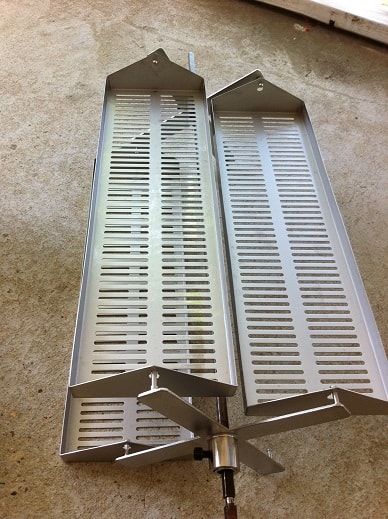 Then tighten up the two spokes with the included Allen wrench.
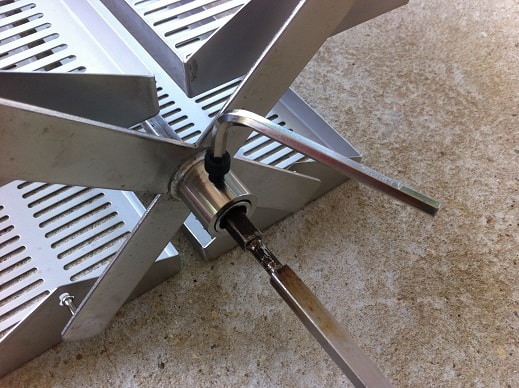 The whole process of assembling the Rib-O-Lator takes less than five minutes.
If you are using a gas grill you need to remove the grill grates before you use the rotisserie. When I used this on my 1000 series Genesis I needed to take out the top row of Flavorizer bars. You will not need to remove the Flazorizer bars on modern Weber grills.
The Rib-O-Lator is pretty tight fit in a 22 inch Weber kettle rotisserie but it absolutely works in it. I found it easiest to insert the rotisserie into the ring and then add the trays. After a few tries you will get the hang of it 🙂
Spend a few minutes spinning the Rib-O-Lator and make sure the trays won’t be rubbing against the side of the rotisserie ring. This isn’t hard but does take a minute or two of paying attention.
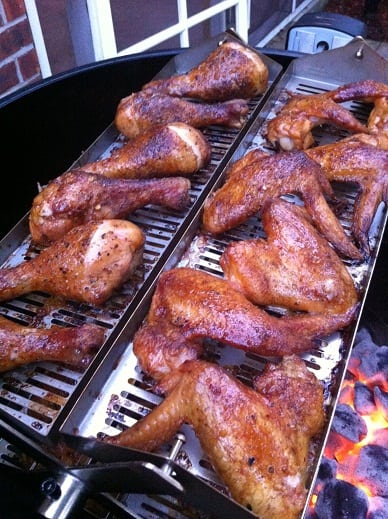
Add a drip pan under the Rib-O-Lator then evenly load it up with whatever you have on hand. In this cook I had a jumbo pack of chicken wings along with some thighs and drumsticks. Bank your coals, turn on the motor and let that baby run!

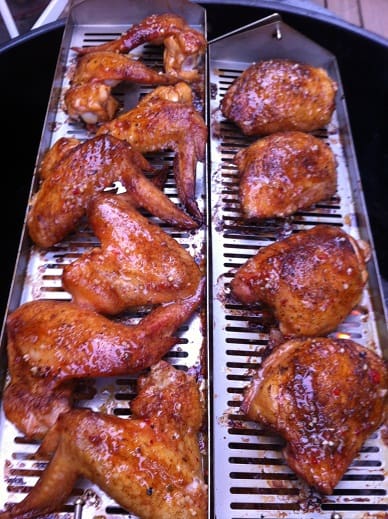 Clean-up is a breeze. I take off the trays, wipe the crud off in the sink then throw them in the dishwasher. I have read some Amazon reviews where folks have a hard time cleaning their trays; the only thing I can figure is that they are dealing with burnt bbq sauce?
A Rib-O-Lator is not something that you really need but it is absolutely something that you will enjoy using.
Here’s an extra little sales pitch….if you know someone who loves to grill then a rotisserie ring and a Rib-O-Lator would make for a gift that they would never forget.

